
Thank you Erin Quinn for sending in this one. I LOVE it!!! Anything cheep and easy is up my alley.

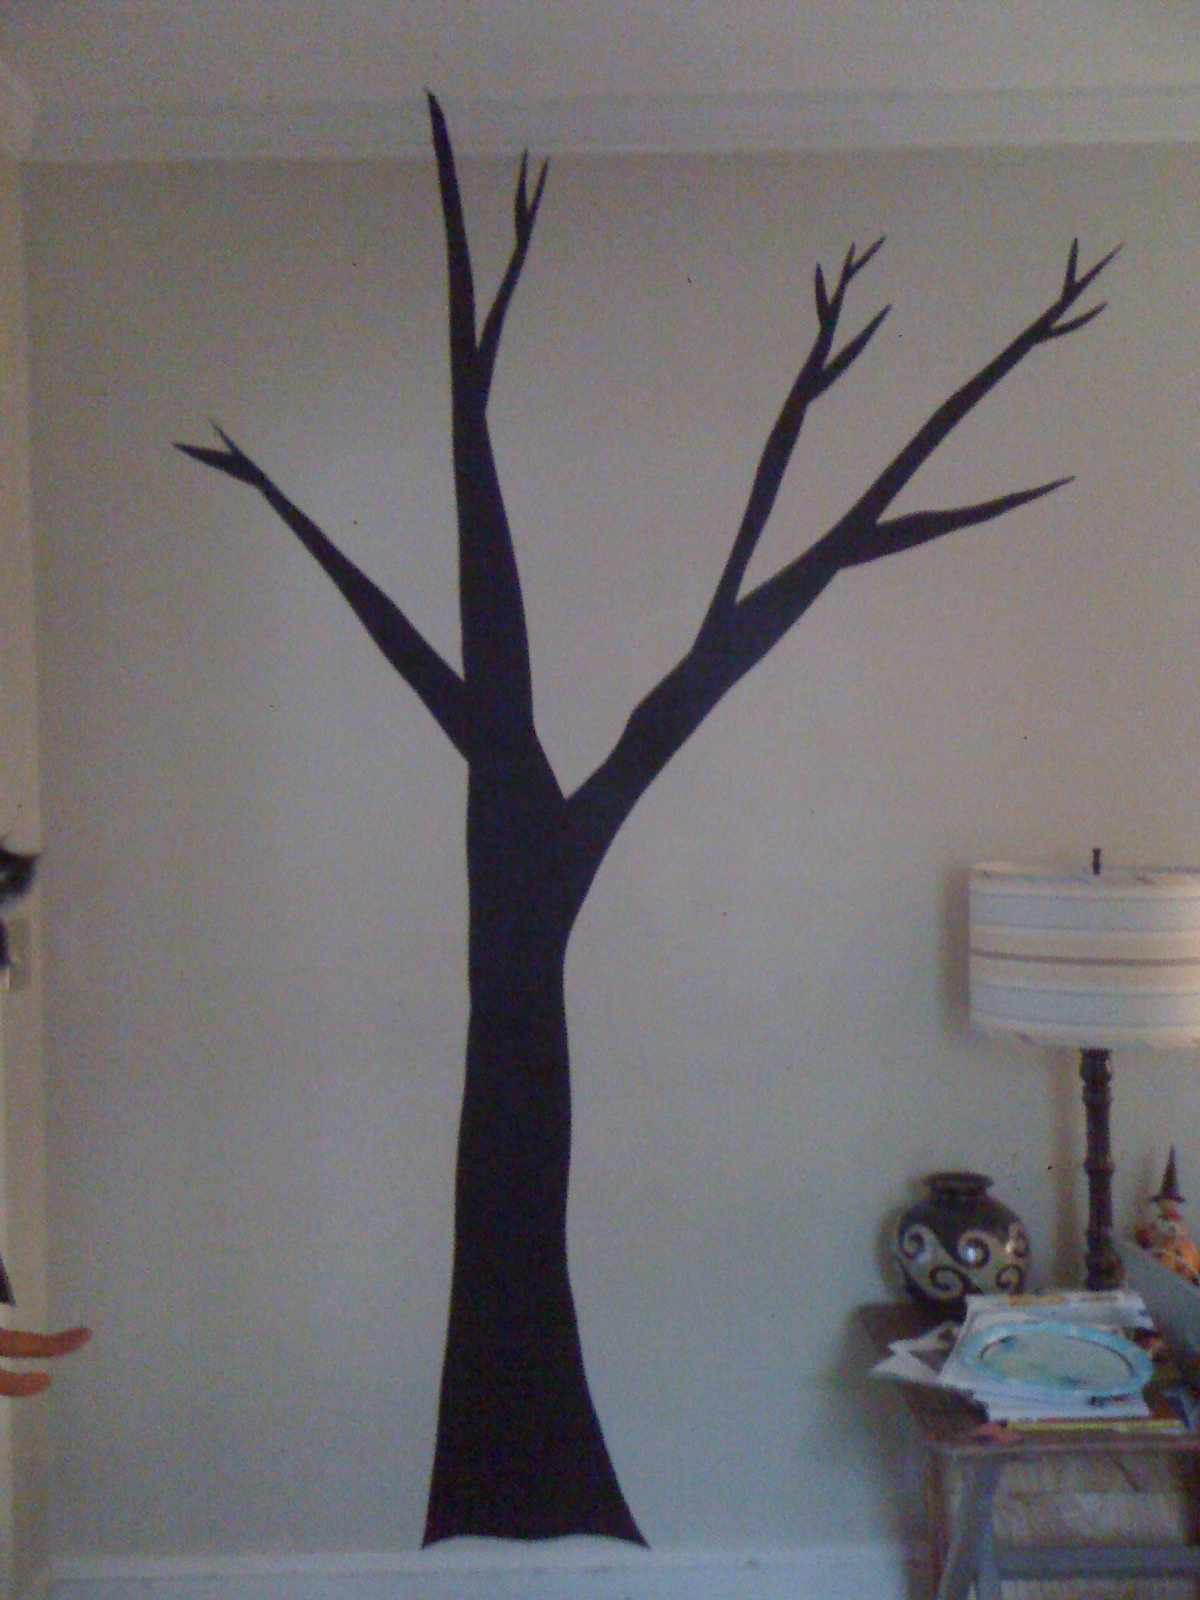
So I've been wanting to add a spooky old tree on the wall the last few years for Halloween, but never quite get around to it. For years I thought I'd use black butcher paper and thought that would work pretty well, but this past summer I came across an idea on the internet (http://www.instructables.com/
So here's how I made my trees:
List of what you'll need:
1 roll black contact paper (I found mine at Home Depot for about $6.50 for a roll of 18" x 15' black faux leather contact paper, which I've made 3 scrawny 7 foot trees out of and still have some small scraps to play with)
1 pair of scissors
I decided to cut the main trunk for the trees separate from all of the tall branches (I think it gives you more flexibility, less errors are possible (as opposed to trying to draw it all out first, and I think it's the best way to use as little contact paper as possible - less waste :) )
Hold the contact paper up against the wall to measure about where you want the main bottom truck to end and the branches to begin so you know how tall to make the main trunk. Then cut out a trunk (contact paper cuts like butter - super easy - you just hold the scissors slightly open and move 'em forward) and apply it to the wall (by peeling the back off of the contact paper). *You could draw the trunk out on the back of the contact paper and then cut it out but its really not necessary.
After applying the trunk where you want it on the wall, then cut tapering branches the length you want them and start to apply them from the trunk upward and outward. Just barely overlap the edges of the contact paper and you won't be able to tell that they're separate pieces - everyone that sees them thinks they're one solid piece.
Next, cut smaller (and random size) tapering branches and apply.

When branches don't look quite right or are too thin in places or don't quite connect to each other, then cut more pieces of contact paper to "fill in" the holes. You'll never be able to see it! :)
I added a paper cut out raven (black cardstock with double stick tape on the back) on one of the branches that is inspired by a Martha Stewart template a few years back.
A few ideas that I'm going to add/try later with the tree - add more ravens and an owl (which you could cut out of cardstock or the contact paper). I've also thought about "wrapping" - a least giving the appearance of wrapping - a string of orange lights "around" the tree by attaching them onto the tree with black electrical tape so that you can't see the tape. I'm sure you can all think of even more fabulous ideas! (A bunch of friends want me to keep these up year round and I thought it could be fun to "decorate" them for each holiday.)
***And a note: Since finishing this project, I've now found contact paper at the dollar store (not black, but you could spray paint it black (those $.94 cans from Walmart would do the trick) or you could spray paint it any other color for that matter. At "Dollar Tree" its $1 for an 18" x 9' roll, so you could get the same amount I did for only $2!! .... and you might get lucky and even find the color you want so you don't have to paint it!... or you could do a spooky white tree or a brown wood grain tree... the possibilities are endless!!! :)


Happy Halloween!
Love this idea!! Brooke, you and Erin are both so talented!!
ReplyDelete